How to Clean a Green Pool?
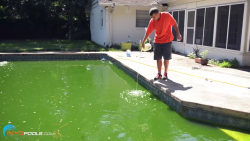
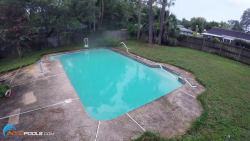
As you may or may not know, we love taking on challenging swimming pools so that we can create helpful pool videos and blog posts. Recently, we took on a pool in Longwood, Florida, that has been neglected for four years. It literally turned into a swamp. We’re talking about hundreds of tadpoles using this pool as their home.
We will show you how you can turn a green pool into crystal clear water in a matter of days. The pool we worked on was an extreme case, but the process is the same for a mild algae bloom.
At INYO, the process we officially adopted for cleaning a green pool is called the SLAM method. The SLAM method was coined by our friends over at Trouble Free Pool and stands for Shock, Level, And Maintain. This means you will bring your chlorine level up to Shock Level And Maintain the pool at shock level until you kill all of the algae. There are many methods for cleaning a green pool, but in our opinion, this is the simplest and will easily bring any pool from green to crystal clear. The SLAM method normally takes a few days, but you need to follow the process to a tee, don’t skip any of the steps.
The SLAM method normally takes a few days, but you need to follow the process to a tee. Don’t skip any of the steps.

Why Did My Pool Turn Green?
First, let’s talk about why your pool turned green. A pool turns green for one reason – algae. The SLAM process kills the algae in your pool and also takes preventive measures so that algae cannot live in your pool in the future.
How Do I Kill Algae?
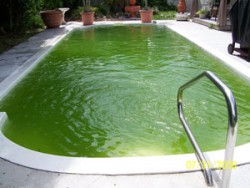 The next logical question is how do you kill algae. Algae are killed by chlorine. So, why don’t you just dump a boatload of chlorine in the pool and call it a day? This is essentially what we are doing, but there is one more important piece of the puzzle before you can start adding chlorine to your pool.
It is important to understand what items consume chlorine. Chlorine is consumed by two things – organic material in the pool, like leaves or algae, and UV rays from the sun. Before you start adding chlorine, get as much of the big debris out of the pool as you can. This is considered organic material and will deplete your chlorine quickly.
Secondly, you need to get your cyanuric acid (also called stabilizer) into the optimal range. Cyanuric acid (CYA) acts as a sunscreen for your chlorine and protects your chlorine from being rapidly depleted by the sun.
Overview of Cleaning a Green Pool
- Remove debris from pool
- Adjust CYA to proper level
- Bring Free Chlorine to shock level
- Remove dead algae
- Perform Overnight Chlorine Loss Test (OCLT)
- Let Free Chlorine levels return to normal
Step-by-step Process for Cleaning a Green Pool
Now that we have a brief overview of why your pool turned green and a basic plan for bringing it back to crystal clear, let’s dive into the detailed step-by-step process of bringing your pool back to life.
Things You Will Need
- A good test kit (one that tests for FAS DPD)
- It is important to have a FAS DPD test kit as they are the only test kits that measure Free Chlorine at high levels. We suggest the TF-100 Test Kit from TF Test Kits
- A net, pole, brush and vacuum
- Pool chemicals (this will vary based on your test results)
Daily Tasks
- Run your pump & filter 24/7
- Brush pool walls
- Clean your filter
- Test Free Chlorine
Step 1 – Clearing Debris
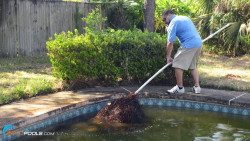 Before you get to nuke your algae with chlorine, you need to get rid of the large debris from your pool. Remember, organic material is one of the consumers of chlorine. So, the more large debris you can remove at this point in the process, the less chlorine you will need to use.
Depending on how bad your pool is, the debris removal can be a big project or a small project. In the case of the pool that we were working on, this was one of the most time-consuming steps of the process as there was a ton of debris in the pool.
-
Surface skim
Start off by surface skimming any debris from the surface of the pool.<
-
Deep net
Deep net all the big debris and gook from the bottom of the pool. In our pool, this took us half a day as there were so many pine needles, frogs, and tadpoles.
-
Vacuum
This is where you will vacuum as much debris from the bottom of the pool as possible. It is best to vacuum directly to waste meaning that the dirt and debris from the bottom of the pool are being vacuumed directly out to the yard and not returning back to the pool. If you have a sand or DE filter, there will be a setting on the backwash valve labeled waste. Turn the valve to this setting. For a cartridge filter, there will often be a ball valve that you can open to vacuum to waste. When vacuuming to waste, a backwash hose can be handy which allows you to drain the water further out into your yard and not right next to your equipment.

Step 2 – Test & Balance Water
We can’t stress how important it is to get a good test kit like the TF-100 Test Kit as this kit has the FAS DPD test which allows you to test chlorine at the high levels reached during SLAM.
Once you have as much of the debris as possible removed from the pool, you will test and treat your pool water. Below is a handy chart showing you the ideal levels for your most critical chemicals, followed by the tests you will perform.
Ideal Chemical Ranges
| Using Liquid Chlorine | Using a Salt System | |
| pH | 7.5 – 7.8 | 7.6 – 7.8 |
| Free Chlorine (FC) Shock Level | 12 – 24 (See Chlorine Chart for exact levels) | 28 – 31 (See Chlorine Chart for exact levels) |
| Free Chlorine (FC) Target Level | 3 – 7 (See Chlorine Chart for exact levels) | 3 – 7 (See Chlorine Chart for exact levels) |
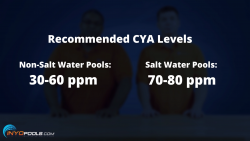
| CYA | 30 – 50 | 60 – 80 |
Note: The pool that we worked on was a liquid chlorine pool so we used the levels for a liquid chlorine pool. If you have a saltwater system, use the water chemistry levels indicated for a salt system.
Test #1 – pH
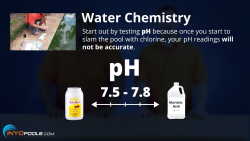
- The first thing you will want to test is the pH as once you start to “SLAM” the pool with chlorine your pH levels will not be accurate. Your pH should be between 7.5 and 7.8.
- If your pH level is above 7.8 then you will use muriatic acid or pH decreaser to lower your pH. If your pH is below 7.5 then use pH increaser (also called soda ash) to increase your pH.
Test #2 – Cyanuric Acid (CYA)
Here is where you get into the heart of the SLAM process so pay close attention to the next few steps.
- Test your CYA
- Record your CYA
- In our pool we had 10 PPM CYA
Adjust CYA, if needed
The relationship between Free Chlorine (FC) and CYA is possibly the cornerstone of the SLAM process. CYA is sunscreen for your chlorine. If your CYA is too low (below 30) then your Free Chlorine (FC) will be rapidly consumed by the sun and if your CYA is too high (above 50 in a non-salt pool or above 80 in a salt pool) then you greatly reduce the chlorine’s effectiveness to kill algae. This step is very important so don’t skip it, because you need to make sure your CYA is within the acceptable range.
- If your CYA is too low then use the Pool Math Calculator to determine how much CYA you need to add to your pool.
- If your CYA level is too high then the only way to lower your CYA is to remove water from your pool and replace it with fresh water. Use the Pool Math Calculator to determine how much water needs to be removed from your pool.
- Adjust CYA to acceptable levels.
Note: Granular CYA – Stabilizer can take several days to dissolve in your pool. Liquid Conditioner will instantly increase your CYA, but is a bit more expensive.
Test #3 – Free Chlorine (FC)
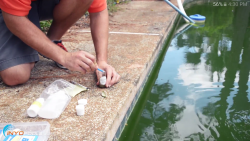
Now that you have your CYA at the proper level you will move on to testing your Free Chlorine (FC). Remember you need to use a FAS DPD test kit as it is the only test kit that measures Free Chlorine (FC) at very high levels.
- Using your FAS DPD Test Kit, test your free chlorine.
-
- Record your Free Chlorine (FC)
- In our pool we had 0 PPM Free Chlorine (FC)
Step 3 – Determine Your Shock Level
Now that you have your Free Chlorine (FC) and CYA levels recorded you can determine your shock level.
- Refer to the CYA – Chlorine Chart to determine your shock level.
- For our pool we had a CYA of 30 and according to the CYA – Chlorine Chart at 30 PPM CYA we need to bring our Free Chlorine up to 12 PPM to reach shock level.
Step 4 – Determine How Much Chlorine Is Needed to Reach Shock Level
Use the Pool Math Calculator to determine how much chlorine you need to add to reach shock level. There are a few different types of chlorine you can use to reach shock level and they are Granular Chlorine (Dichlor / Trichlor), but this adds CYA to your pool. Then there is Cal-Hypo, but this will increase your Calcium Hardness. Your third option is liquid chlorine which only affects your Free Chlorine. Since liquid chlorine does not affect any of your other chemicals, we suggest using liquid chlorine. You will want to check the strength of your liquid chlorine as liquid chlorine ranges from 3% to 12% concentration, and this will affect how many gallons you will need to add to your pool.
- Refer to the Pool Math Calculator to determine how much chlorine is needed to reach your shock level (refer to Step #3 to determine your pool’s shock level).
- According to the Pool Math Calculator we needed to add 3,5 gallons of 10% strength liquid chlorine to bring our 30 000 gallon pool up to its shock level of 12.
- You may find the Pool Volume Calculator helpful to determine the gallons of your pool.
Step 5 – Add Chlorine
- Add the suggested amount of chlorine determined in Step #4. In our case, this was 3,5 gallons of 10% strength liquid chlorine.
- For liquid chlorine, we suggest that you walk around the perimeter of the pool while you evenly pour the chlorine into the pool or you can pour the chlorine in front of one of your pool jets.
Step 6- Re-test Free Chlorine (FC) & Add Liquid Chlorine (perform every couple of hours at start)
After adding your chlorine, wait an hour and test your chlorine. If your Free Chlorine (FC) is at or above shock level then do nothing. If your Free Chlorine (FC) has dropped below your shock level then add chlorine to bring your level back up to shock level. Continue to test and adjust your chlorine to shock level as frequently as practical, but not more than once per hour, but at least twice a day.
The addition of chlorine will be frequent during “SLAM”, especially at the beginning. This is the stage where a lot of people get tripped up as they bring their pool up to shock level once and then don’t continue to test and add chlorine. Algae and other organic debris will consume chlorine very rapidly at first. As things progress, you will lose less chlorine each cycle and you will add chlorine less frequently. The reason for this is that you are killing the organic material meaning there is less organic material in your pool to consume your chlorine.
- In our pool when we re-tested our chlorine after one hour, we had 0 PPM of chlorine. Remember algae consume chlorine. We had so much algae in our pool that the 3,5 gallons of chlorine were consumed by the algae within less than an hour. So we added another 3,5 gallons of chlorine and tested in two hours and our chlorine was at 3 PPM. We then used the Pool Math Calculator and determined we needed to add another three gallons to reach shock level.
- So we added another three gallons and re-tested the following morning and we were at 13 PPM Free Chlorine (FC) which was above our shock level so we did not add any more chlorine at this point.
- Three hours later we tested our Free Chlorine (FC) and we were at nine which is below our shock level of 12 so we added another gallon of chlorine which brought us back into shock level. It is normal to see your chlorine levels drop during the day as the sunlight will be consuming some of your chlorine.
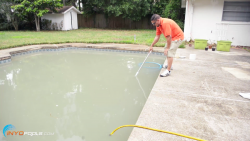
- During this process, we saw the pool turn from green to cloudy. The pool will be green when you have live algae in the pool and when you kill the algae, the dead algae will turn the pool from green to cloudy or milky and then to crystal clear.
- Continue to maintain your pool at shock level until your pool is crystal clear.
Step 7 – Remove Dead Algae (Don’t Forget to Brush – Vacuum – Clean Filter)
Every day during the SLAM process you will want to brush the sides of the pool and as much of the floor as possible. This will help dislodge any algae clinging to the sides of the pool. When you are killing your algae, the dead algae will drop to the bottom of the pool so it is important to vacuum up the dead algae daily. If you are manually vacuuming the dead algae then this will be collected in your pool filter so you will be cleaning your filter daily. Also remember to run your pump and filter 24/7 during this process.
Note: The process of clearing the dead algae can take from a few hours to a week depending on how much dead algae need to be cleared.
Step 8 – Overnight Chlorine Loss Test (OCLT)
Once your dead algae are removed and your water is crystal clear you will want to do the Overnight Chlorine Loss Test (OCLT). This test lets you know if there are any algae left in your pool. As we have discussed before, there are only two items that will consume your chlorine namely organics (i.e. algae) and sunlight. The OCLT requires that you test your water at night and in the morning before the sun comes up. This allows you to rule out sunlight as the culprit for consuming your chlorine. If you are losing Free Chlorine (FC) when there is no sun on the pool then we know this loss is due to algae and you need to continue to shock your pool until all of your algae are killed. You know you are done with the SLAM process when you pass the Overnight Chlorine Loss Test (OCLT). The OCLT is performed as follows:
- Take your Free Chlorine reading in the evening after the sun has gone down and record your Free Chlorine reading.
- In the morning before the sun comes up, test your Free Chlorine level again. If your Free Chlorine (FC) has stayed the same or dropped by less than one and your combined chlorine is less than 0.5 then there are no organic contaminants in your water and you have passed the OCLT.
- If your Free Chlorine (FC) has dropped by more than one or your CCs are above 0.5 then continue to maintain your pool at Shock Level and perform OCLT the next night.
Note: If you have a salt chlorinator make sure to turn it off during OCLT.
You Are Finished Slamming When:
- Your Combined Chlorines (CC) are 0.5 or lower
- You pass the Overnight Chlorine Loss Test
- Your pool is crystal clear
Step 9 – Let Chlorine Return to Target Level
After passing the OCLT then let your Free Chlorine (FC) levels return to your target level as listed on this Chlorine Chart. Now that you have no algae in the pool, you can maintain much lower levels of chlorine than the levels reached during the shock period. After the shock period, you can maintain your chlorine levels through slow dissolving chlorine tablets, liquid chlorine or a salt chlorine generator.
Maintenance After Getting Rid of Algae
You can now breathe a sigh of relief as your algae are gone and your pool is looking great! By following a few simple steps you can make sure the algae will not return. First and foremost, make sure you stay consistent about testing your pool water. We suggest daily testing, but we realize that may not be realistic for most pool owners so if you can do weekly testing you should be in good shape.
If you can keep the following three items in the acceptable range then you should be all set. The three most important items will be your Free Chlorine (FC), CYA and pH. We also suggest brushing and vacuuming once per week.

Hacks
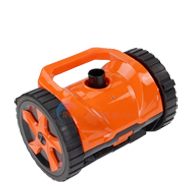
With every pool, there are always unique situations that you will run into that cause you to adapt. With our pool, we ran into the following issues. First, our skimmer line got clogged so we could not manually vacuum the pool. This meant that we opted for a robotic pool cleaner to help vacuum the pool. With a robotic cleaner, the debris is collected in cartridges or a bag in the cleaner and not back at the pool filter. We also used an item called a leaf eater which is a device that attaches to the end of your telescopic pole. You then attach a garden hose to the leaf eater. The leaf eater is pushed around the bottom of your pool where leaves and debris are collected in the bag on top of the leaf eater. I like the leaf eater as it works independently from your pool pump. It is solely powered by a garden hose and is really good for large debris.
Our pool filter was very undersized to deal with all of the dead algae so we upgraded the pool filter from a 100 Sq. Ft. filter to a 500 Sq. Ft. filter meaning the new filter had five times the filtering capacity. The pool we worked on had not been functioning in four years so when we went to turn the pump on it was a no go. The motor was dead so we had to replace the motor and shaft seal. This pool had a really bad problem with debris as it was overhung by two huge pines that were constantly dropping pine needles into the pool and there was also a section of the lawn that when it rained would drain dirt into the pool. For the future, we suggested a few options to the homeowner. First that they add a screen enclosure, cut down the pines or purchase a leaf net. It would also be a good idea to fix the drainage to drain away from the pool.
Review
Finally on a pool as bad as the one we worked on it may have been quicker and more cost-effective to drain the pool completely, acid wash the pool and then refill. In the future, we plan on tackling another neglected pool and take the draining approach. We will report back on which process was more cost-effective and quicker. However, for the 99% of pools, the SLAM method is definitely the best approach.
If you are dealing with a green pool, we would love to help. Just post your pool water test results in the comments section below and we can help you to bring your pool to crystal clear in no time at all.
Since the day we posted this article/video many of our followers have asked if it is better and less expensive to drain and clean your pool compared to treating a Green pool with chemicals. We have a New Updated Article and Video on How to Drain and Clean your Pool, our general consensus is that if you cant see the bottom of the deep end of the pool then it is best to Drain and Clean your Pool as this will be quicker and less expensive then treating the pool with chemicals. If you can still see the bottom of the deep end then proceed with this guide on How to Clean a Green Pool with Chemicals





when you SLAM, should you adjust the PH if it gets out of range or do you only adjust the ph at the start?
Adjust the CYA to 30-40 ppm, and get the pH and alkalinity into their acceptable ranges of 7.2-7.8 and 80-120 ppm respectively before starting your SLAM process.
After adding the chlorine ( to get ready for the slam process) must I have my setting on recirculate for the full duration or must it be on filter?
We usually leave on the normal filtering mode.
I just renovated my pool. New plaster, new tile, and new coping. Today is Day 7. My pool turn cloudy but blue on day 3 (probably due to many factors). The pH was low on Day Day 5 so I added soda ash. Once pH and alkalinity was acceptable, I retested at a pool supply store. They said I had too much metal so I added metal free on Day 6. Day 7, I am supposed to work on my chlorine level so I added liquid chlorine. My pool turned green. I backwashed and added more DE. Water level was low so I added garden water to raise my water level. My pool is now murky brownish-green. I got my water tested and my copper level is normal, but still no chlorine. My pool is still murky green. I added more DE and chlorine granules. This is what I was told. I just want to double check if there is anything else I can do. The CYA is 5.0. Below is the rest of the readings. Any suggestion will be greatly appreciated.
ph: 7.7
Alkalinity: 103
Total Chlorine: .48
Free Chlorine: .2
Calcium: 105
Copper: .2
Phosphates: 37
Cyanuric Acid: 5
The last thing you mentioned is the reason there is no chlorine in your pool. Chlorine requires CYA to be able to stay active. Without CYA, the sun will burn off chlorine pretty quickly; at least, any chlorine leftover from killing bacteria and algae. First things first, raise your CYA to between 30 – 50 ppm. Your pool store should have told you that straight away.
Trying to open my pool for the season. This morning I had it to “cloudy” but 0 ph. When I started adding ph up it turned a dark green. Ph levels are still not where they should be. Do I keep adding ph up?
I’m curious what the size of the pool is in this example? I am trying to clear a 28000 gallon pool and added 3 gallons of chlorine, the amount I calculated to be enough to bring it to shock level, but after 1 hour it was already down to 0 and then the same thing happened again when I added another 3 gallons. I hope I’m doing this right, but the pool was extremely neglected with lots of algae, so maybe this is correct.
First time pool owners. We took in a sample yesterday the fc 0.08 tc 0.08 CC 0 cya 2 ph 6.9. Pool place told me to dump 18 gal of liquid shock into our 18000 gallon pool. I dumped 20 gallons on accident. I then took a sample back today (24 hours later) per their request and the ammonia level was worse. Fc 0.73 tc 11.22 CC 10.49 ph 6.5 cya 2. They told me to dump 28 gallons liquid shock, let it circulate and come back in 2 days. I’ve dumped the chemicals, but according to your guide I need to bring up my cya First? They told me not to do any vacuuming/cleaning either. 200 lb sand filter. My water looks less murky/green but still cloudy. I cant see more than a couple feet down, tops. Any advice would be appreciated.
Had a Strep throat & earache in Nov & was unable to close pool . I had a solar cover on it , got most of the leaves out , put start up chlorine in it , drained a third first, put algaecide in & now the ph is 6.7 & ammonia almost null . The water is getting lighter, first looked like Lipton Tea . I backwashed , waste & recirculated but sand is coming up on 4th season . Should I change now or wait till algae is all clear , I have 100 lbs .
Probably too late for this response but in my experience, as I learn the hard way every year, if you’re seeing sand in your pool then that mechanism inside(I think it’s called the lateral) might be cracked. I failed to winterize my pool twice for various reasons and both times the water inside the sand filter froze and cracked the lateral. Everything still worked but the pool would never get completely clear and the return was always sending sand into the pool. I had to take everything apart and replace the lateral along with new sand and problem was solved. So lesson learned twice for me, drain the water out of sand filter and put dial on winterize before freezing temps hit, if they do in your area. Hope this helps someone from having to take the time, along with frustration and expense that was involved for me. Twice
Can you shock a saltwater pool with chlorine like you would a regular pool , as demonstrated here? We have a Hayward Aquatrol system.
Yes, definitely. The salt system is making its own version of chlorine, so there is no adverse reaction when you use regular chlorine shock to give it a boost.