Now there’s a loaded question! The quick answer is yes. Many pool owners successfully tackle pool equipment repairs, the most common being motor or pump replacement, pump and cleaner repairs, and filter cartridge replacement. About 50 – 75% of these are done by homeowners. But there are some caveats. One, some repairs – heater installation or repair and automated controls installation – are more complex and may require a pool professional. You can still save money in these cases by getting the equipment or parts online and then paying a local pro for labor only. Two, if you are hopelessly non-mechanical or temperamental, you could end up doing more harm than good trying to save a few bucks, and then need to call your repair guy or gal anyway. So start with an honest assessment of your DIY skills. Some questions to ask yourself:
- Am I able to accurately diagnose the problem?
- Am I knowledgeable and comfortable enough to work with electricity if needed?
- Can I confidently reassemble what I’ve taken apart, i.e. keep track of the order and position of parts?
- Can I follow written and/or video instructions?
- Do I have or can I get the necessary tools without spending too much?
- Am I operating within my local requirements regarding plumbing and electrical work?
If you are positive about all of the above, then you’re in a pretty good position to go for it! Here are some steps to plot your course:
Do Your Research
 There are many good resources available to build a solid foundation for do-it-yourself pool repair. While not exactly a page-turner, the owners manual for whatever piece of pool equipment you’re tackling is often a useful guide. This provides an overview of the product and usually an exploded parts diagram which is very helpful for getting a sense of the order of parts.
Don’t stop there though. You can find much more engaging information and advice online by way of videos, how to guides, and pool forums. Having an overview as well as step-by-step details will give you a good idea of the scope of your project.
Organize Your Workspace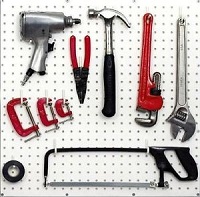
You’re about to perform a perhaps not-so-delicate operation but you can still think like a surgeon and have all your tools ready. Of course, you’ll want close at hand the replacement pool parts you purchased, and a set of standard hand tools along with any specialized tools required for your particular repair. Depending on the job, you might also need some rags, lubricant, glue, tape, protective eyewear, etc. If you are replacing a shaft seal, gloves are recommended so you don’t get any oil from your skin on the face of the seal. Don’t forget a big bottle of cold water to keep you hydrated.
Prep Your Equipment
Depending on what pool equipment you’re working on, you may need to turn off electricity, change valve positions, release pressure, etc. For safety, double check instructions and make sure any and all equipment is in the correct state before disassembling anything.
Pay Attention to Detail
 The order of parts can make or break your DIY adventure. If you have good visual memory, be sure to use it now and take a mental snapshot of which parts go where. Memory not so good? No problem – this is when your cell phone camera becomes an extremely helpful tool. Take photos as you go along so you can refer back to them should you get confused during reassembly.
Take It Step by Step
Meditate on the old adage “do it right the first time”. Don’t be in such a rush to complete the job that you miss some crucial little step like lubricating an o-ring, tightening a fitting, or worse, altogether forgetting to install a part. If there is any wait time involved, for example adhesive that needs to dry, be patient. Go take a nap or have a snack – the pool isn’t going anywhere.
Test Your Work
Just as above when you prepped your pool equipment prior to repair, now you can put everything in proper position to turn it back on and assess how you did. Once up and hopefully running, look for obvious issues like leaks, sparks, abnormal sounds, etc. Check back periodically to make sure all continues to operate smoothly. If it’s not, this would be when you’ll want to shut things down and call for backup. Our techs can offer some basic troubleshooting by phone at 877-372-6038; more complex issues will probably require a service call from your local pool company.
One side note about DIY installation of new pool equipment. If you are considering installing a “whole good” yourself – such as a complete pump, filter, or heater – check the fine print in the warranty. While most warranties are not voided if a non-professional does the repair/installation properly, some manufacturers require that all such work be performed by a licensed, professional installer. Just be sure to review the full warranty details and make an informed decision before tackling installation on your own.




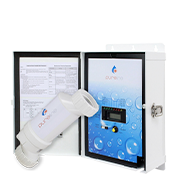

Do you top two lights on my diagnostics come on for a little bit and cut off and is not generating salt what is problem
First, we will need to know what model salt chlorine generator you own. Second, usually generator lights have text next to the light to describe what the light it alerting you to. Does your control box have text next to the lights describing their function?