A sure way to help keep your swimming pool clean is to actively maintain and repair your multiport valve before it gets to the point of no return. The multiport valve on your pool filter is essential. In fact, it acts sort of like the steering wheel on your car. The multiport valve controls the direction you want the pool water to flow in. By maneuvering the multiport valve, you can rinse, backwash, or filter your pool water.
In this blog post, we provide tips, tools, how to guides, and videos on how to maintain and repair your multiport valve properly.
Multiport Valve Leaks Around The Handle
One of the most common problems we hear from pool owners is a leaky valve handle. Sure, it’s typical to see water on top of the multiport valve cover- especially, after it rains.
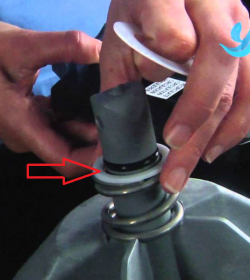
However, if water rises from within the valve and overflows to the lid, you have a common multiport leak. Under the handle, on the stem of the diverter are gaskets. These gaskets prevent water from flowing through.
A multiport valve that leaks around the handle means your gaskets are deteriorating or they are out of alignment. Cold water actually makes conditions worse. In cold weather, o-rings shrink or small debris wedge around the stem o-rings, causing leaks. However, you can’t determine what the issue is until you disassemble the top half of your multiport valve.
If you need assistance getting into the O-ring, we recommend reviewing our how-to guide, How To Replace a Pool Multiport Valve Spring. Once you’re able to get a good look at the o-ring, you can determine if it needs replacing or simply repositioning.
Most valves have rebuild kits that include every o-ring and gasket. Ideally, this would be the way to go.

Multiport Valve Leaks Around The Cover
When the cover on your multiport valve leaks, the first thing you should check is your system’s pressure. A dirty filter or a closed return valve can cause high pressure 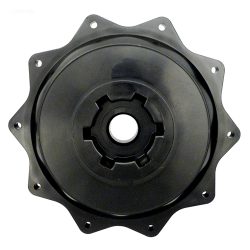 and lead to leaks. However, if your pressure is normal, double check the cover screws. If everything pans out, your best bet is the cover o-ring.
You can find the cover o-ring in the seam between the valve cover and main housing. To access this gasket, remove the 6 to 8 screws on the valve cover. Peel the o-ring out, clean the groove, lubricate the new o-ring, and reinstall the cover. Valve cover o-rings rarely go bad over time. However, we recommend replacing the o-ring if it’s damaged or broken.
Multiport Valve Body Leaks
Another common area multiport valves are prone to leak is in the three ports. Multiport valves have three ports, Multiport valves three ports: pump, return, and waste. The area where you install the pump and return pipes are common spots for leaks. One cause is when the pool heater shoots hot water back to the valve.

The heat shrinks the PVC connector. As a result, water seeps through the gaps.
However, over tightening the adaptor on the valve is probably the most common reason why leaks spring up near the pipes. In most cases, you can simply replace the PVC fittings and some new pipe. You can find these parts at a local hardware store.
A cracked valve body isn’t the end of the world. You can replace just the body or you can replace the entire valve. Obviously, the body is much cheaper, however, if you had the leak for some time, odds are, there are other internal parts that also need replacing. Your best bet is to do a thorough inspection before making a purchase.
Multiport Valve Leaks Out of the Waste Port
For the record, water is not supposed to come out of the waste port. So, if you’re not backwashing your filter and you see water leaking out of this line, it’s definitely not a good sign. If more water than usual is coming out of your waste port, that is a sign that you have a bad spider gasket, a bad spring, or a failing key seal assembly.
The only thing is, you have to open up the valve and examine the parts before knowing which part to replace. In some instances, though, the easiest route is simply to replace the entire valve.

Replace Your Spider Gasket
The spider gasket is the main diverter seal within your multiport valve. Spider gaskets divert water and keep it moving in the correct direction. It also keeps the flow moving on time as well.
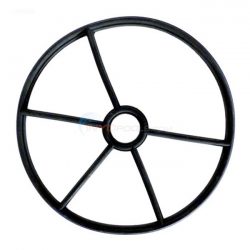
The spokes of the gasket are the last buffer preventing water from skipping past your designated destination and out of your waste port. When they break free or warp out of the o-ring groove, water exits out the wrong hole. Replace your spider gasket if it is ripping, deteriorating, or just in poor shape.
The process of removing the spider gasket varies from model to model. Some spider gaskets slide into place with a little lube. While others are glued to the pinwheel.
Below is a video showing you how to replace a spider gasket in your multiport valve. We also have a printable How-To Gude that walks you through the process step by step.
Replacing Your Key Seal Assembly
In some instances, you find spider gaskets that won’t come out of the diffuser. Or, you open the valve and realize that the diffuser and spider gasket are bad.
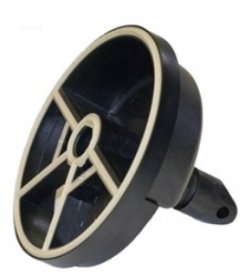
If you’re in this situation, it might be more logical to replace the entire key seal assembly.
The key seal assembly includes the diffuser with the spider gasket already glued in. This allows pool owners to replace the entire pinwheel easily without messing with the spider gasket.
Here are our video and a printable how-to guide showing you how to replace a Hayward key seal assembly. However, you can adapt this process to any model valve.
Replacing Your Valve Spring
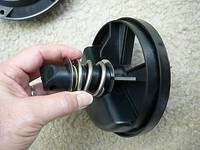 Another reason water might come through the waste port is a faulty valve spring. Occasionally, the valve spring may break or weaken. When this happens, the spider gasket won’t sit or seal properly and cause leaking out of the wrong port.
I’ll be honest, though, replacing the valve spring isn’t much fun. Manufacturers sandwich the spring on the diverter assembly, making removing the spring that much more complicated. The hard part is getting the spring depressed enough to secure the handle pivot rod.
However, if you’re feeling brave, we have a how-to guide that walks you through the process. For the most part, we recommend replacing the key cover and handle assembly to avoid dealing with the spring altogether.

Replacing Your Key Cover & Handle Assembly
If you open your valve and determine that the diffuser, spring, and/or your spider gasket is in poor shape, the easiest solution is to replace the entire key cover and handle assembly.
This is literally the top portion of your valve, so it removes any complications associated with replacing the valve spring, cover, handle, or spider gasket.
Although it does cost more to replace the entire assembly, it does save you the headache of doing it yourself.
Replacing Your Complete Valve
For some pool owners, replacing the complete valve is the only way to move forward. If the valve body cracks or you’re having major internal problems, we recommend replacing the complete valve.
Or, if you’ve had your valve for years and think it’s time for an upgrade- replace it! Below is a complete video walking you through replacing a complete multiport valve.
If you’re a pool owner experiencing difficulties with your multiport valve, don’t fret. If our videos can’t help you, give us a call and speak with one of our qualified technicians. We will definitely help you to replace your valve and restore health to your swimming pool.




Why does my multiport handle point the wrong direction? When pointing to filter, it seem like backwash is on. etc. It looks like it is lined up.
Have you recently installed a new handle assembly or disassembled and then reassembled it? If so, you may have reversed the handle to open the diverter wedge alignment, explaining the strange water flow.
A more probable possibility is that your spider gasket is damaged or something is causing the diverter to separate from the valve’s base, allowing water through to the Waste line while on other settings. or the diverter.
Spider Gasket EZ Find Chart
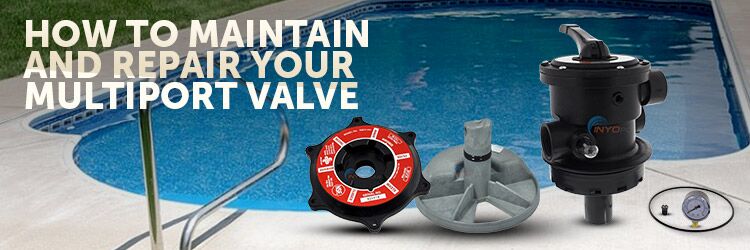
How To Maintain and Repair Your Multiport Valve
I have a leak around where the gauge goes in, is that fixable or do I have to replace the whole thing?
It depends on the make and model of the filter. What is the model number or make and model of your filter?
If you’re not sure, use the steps in this guide to identify your filter – How To Identify the Make and Model of My Pool Filter
Why would i find filter sand in the one segment of the valve ( upper in/outlet from /to sand filter?
thanks in advance,
Ray.
A spider gasket, diverter, or spring could have gone bad. These are simple machines, so the possibilities are limited. Start the troubleshooting to try to find the cause.
Does the end of the multipart valve assembly fit over the outside of the standpipe assembly, or is it supposed to fit inside the end of the standpipe assembly?
Are you only supposed to turn the valve in one direction (such as only clockwise) to prevent wear on the spider gasket? Or is it ok to to turn it either direction as needed?
Only turn the valve in one direction.
Seriously? Nobody ever told me that. I turn it either way and have for years. My multiport valve has three tiny pinhole leaks on the side. Any ideas on how to seal them?
Yes, stop turning your handle both directions…..but seriously. JB Waterweld or plumbing putty/epoxy should work.
My gasket was glued in or something cant get it out. I have try ed cutting scraping digging can’t get it out.
We show how to remove a glued in spider gasket on the below video:
Nice work thanks that’s helped me out. Keep up the great service
I have replaced the key assembly because my Hayward spider gasket is permanently glued in however I am still leaking water out of the backwash. ANY SUGGESTIONS??