Hello, it is it your pool pals Matt and Rob, and today we are proud to introduce Inyo’s new web series called Poolside Repair. This is where we get out of the studio and meet up with real pool owners to troubleshoot, repair or install anything pool related.
In our first episode, we help Lou replace his Pentair Amerilite with a LED Pureline PureColors light. The essential steps for installing a pool light are:
- Cut the power cable at the light fixture end.
- Tie old light cable to new cable, pull through the conduit.
- Wire the new light to the power source.
But as you know with anything involving pools, it is never that easy. Let’s hop into action with the video, and below we have steps so you can follow along with each step.
Step 1 – Pick the Right Replacement Light
You have made the decision to replace your plain white pool white with a color changing LED; the next thing is figuring out which LED will fit your light’s niche and cord length.
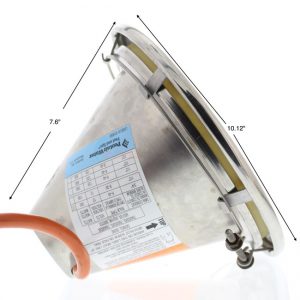
Most incandescent pool lights are a standard size, around 10.12 inches in diameter; for which a LED light fixture like the Pentair Intellibrite, Hayward Colorlogic, and Pureline PureColors are drop-in replacements. If you do not have the original light to measure or just, want to double check you are getting the right light don’t hesitate to call us.
You will also need to measure the length of electrical needed for the installation. To ensure make sure you do not come up short when installing the new light measure the following:
- measure the distance from the pool light niche to the power source,
- the rise from the pool light to the power source,
- tack on five to eight feet so you can pull the light on deck for maintenance later.
In our installation, we are replacing a Pentair Amerilite with an exact drop-in replacement the Pureline PureColors

Step 2 – Turn off Power, Cut Cable to Old Fixture
To make your light circuit safe before removing the old light, shut off your light’s breaker. oOnce this is done, you can remove the light from the niche and snip the power cable just behind the light fixture.
Step 3 – Prepare the Niche, Conduit for New Cable Installation
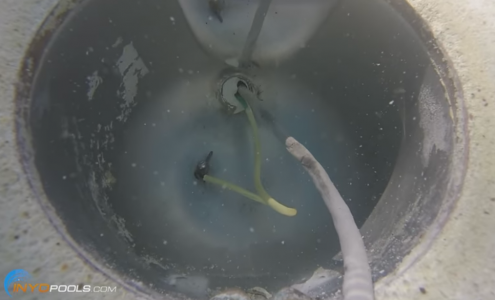
To pull the cable through the conduit, we must remove the watertight seal attaching it to the niche. The most common ways of sealing the niche are epoxy and rubber cord stoppers.
For this installation, the original cable was epoxied in. Remove the epoxy with a needle nosed plier and a flathead screwdriver. For time’s sake, we hope your light has a rubber cord stopper as they are much each to remove and can be re-used. When we install the new LED, we are using a cord stopper.
Step 4 – Tie, Tape, or Bond the New and Old Cables Together

By taping the new cable to the old cable before we pull it out, we complete two steps at once. We remove the old cable while also reinstalling the new light cable. Make sure to use heavy duty duct tape when you intertwine and tape the two cables together.
Step 5 – Pull the Old Cable Through
Get a good grip, and start pulling the old cable through the conduit. We were experiencing a stubborn cable, so we used a spray on silicon lube to make for easy sledding.
In our installation, the cables came loose, so we used a fish tape to pull the new cable. Before cutting the cable be certain you have five to eight feet of cable on the fixture end, so you can pull the light on deck for maintenance in the future.
Step 6 – Install Light Into Niche
Screw in the lock screw to secure the light into the niche.
Step 7 – Wiring a LED Pool Light
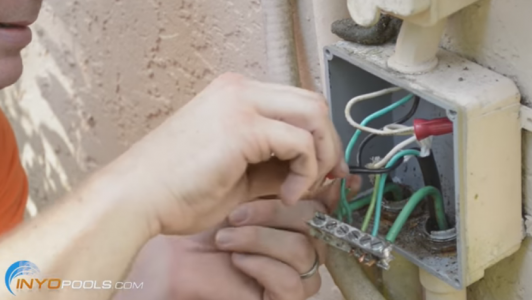
The wiring of LED lights should be similar if not the same as your original light, but to be safe, follow the wiring instructions provided in the owner’s manual.
Step 8 – Enjoy Your New Light
Thanks for joining us on our first Poolside Repair; stay tuned for next time when we install a DE filter.





What did you charge for this job? Since the conduit was a problem?
I am facing a similar job right now myself. I am a pool pro. I offered to put in a 100′ corded incandescent 400W new housing for a customer. $500 including the light. Well it is a 70′ foot pull and I got 7 foot into it before the tape let go. Now it needs to be WireFished through 70′ foot of bad conduit.
Also the cost of the new 100′ cord 400W new housing was paid for out of my pocket and the homeowner is refusing to pay me more for the install or even for the light housing till the job is done.
We didn’t charge, nor do we offer service installs so I am not able to help you with pricing that out.
Hello
If my light is working fine and don’t need to replace it or the conduit, how can I only reinstall my light back into the niche after it came out??
I think there was some kind of bolt that screwed into a bracket? but became detached so the light is just sitting on top of the water attached to the conduit.
Any help would be appreciated!
If your niche is missing the screw connection, use a Light Wedge – 3583-0 to secure the light in place.
Hi
Can you explain more about the ground wire that is in the niche itself? Does that need to be removed as well when installing a new light?
Do not remove the bonding wire.
Goodday, what is pipeless circulation in a swimming pool and spa? And how to i achieve it?
Cross-posting….
We built a pool with our new home (20′ X 45′ in-ground with integrated spa). I only noticed after-the-fact that the pool contractor installed spa-sized lights EVERYWHERE! Because of the this, I find that the brightness for night swimming has a lot to be desired. There are a total of 5 lights in the pool and 1 light in the spa. I think they are all incandescent as well.
Anyway, I’ve been questioning for the last year whether I should upgrade to LEDs to improve brightness. Will this really make a noticeable difference in a spa-sized bulb that has a limited wattage anyway? My pool plaster is Hydrazzo Maui Midnight (so, not white or light blue) if that makes a difference. I know the paler plaster colors hinder the brightness as well.
Would love to know if anyone has a similar experience or have retrofitted to improve brightness at night. Before and after pics would be awesome as well.
Thanks!!
Making the switch to LEDs is not going to improve your brightness, unfortunately. At best it will be a lateral move.
leave enough cord to bring the light up to the pool deck, for future service. Im sure these guys did that, just didnt see it on the video. Good video though..
This was very helpful. I have seen other videos but none mentioned the epoxy in the nitch or the use of the rubber replacement stopper. Thanks
Thanks for these Pool Side Repairs, guys! I probably can do many of these maintenance items if I knew how to do them in advance. These help out a lot!
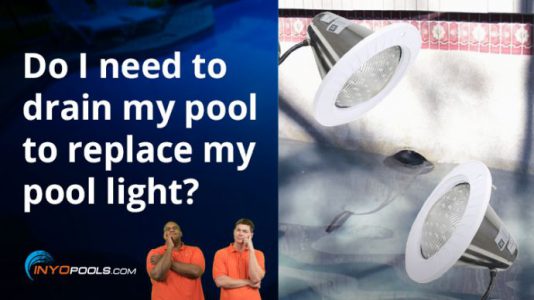
Do you have to drain the water below the niche to change the light
It is not necessary to drain the pool to replace a light. Lou had lowered the water level for other reasons before we showed up.
Thanks.
Did you epoxy the new wiring in the conduit?
We used a rubber cord stopper for the installation. It makes it easier for servicing and installation down the road.