Here comes the Double, prepare for Trouble!
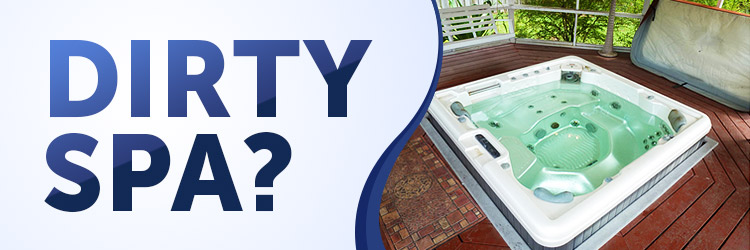
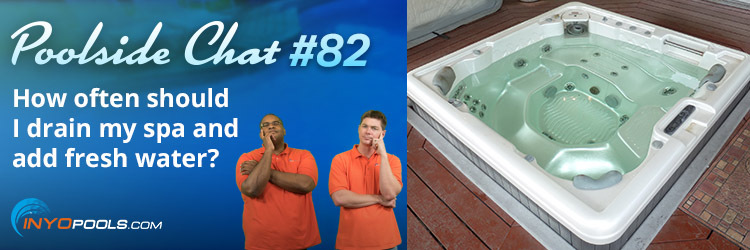
This is a continuation of our previous blog post “Why is My Spa Dirty?” We initially discussed how a spa could get to this dilapidated state and what needs to be done to get it up and running. This blog will cover the cleaning and draining process to prepare for the refill stage. Enjoy!
Weapons of Mass Sanitation
This spa recovery is going to be a complete water restoration, meaning I will be starting from square one once I have drained my spa. The condition of my spa leaves me with no other choice, but besides this, a spa should be drained and filled every three months. When draining and starting anew with fresh water, the possession of a full arsenal of spa treatment chemicals is a must. If new water is chemically imbalanced from the start, we will be playing catch up until the next drain.
For my water restoration, I have chosen a Leisure Time Deluxe Spa Care kit which should provide a wide array of foundation chemical balancers. As complements to the kit, I will be using a select few. The specific kit I will be using is the Deluxe Spa Care kit for chlorine spas.
Pipe (Cleaning) Dreams
Before we flush this toilet of a spa we need to clean the parts we cannot see. Spa plumbing is the forgotten sibling in the hot tub family – out of sight, out of mind. I liken them to Chuck Cunningham from Happy Days. Do you remember him? No, I didn’t think so. All that dirt and grime settling in the hot tub is getting there by way of the plumbing. There is a good chance a nasty gunk pile of it sits somewhere in your pipes causing flow and sanitation issues. If we wish to stop the cycle of dirty spa and water imbalance, we must start with the pipes.
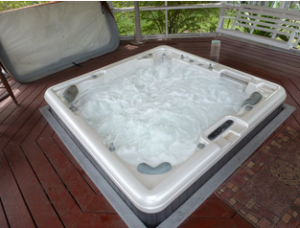 The application is simple: all you do is remove the cartridge and turn on your pump and blower, then pour in the entire contents of the Spa Jet Clean bottle. Voila that was quick. I let the pump circulate for about 25 minutes instead of the bottle recommended 15. Desperate times call for desperate measures. After the initial circulation cycle, we let it settle for an hour.
Word of caution: Once the chemical is applied to the water for the initial 15 minute circulation, I suggest clearing the area. I was in a well-ventilated space but once the water started swirling so did my head. I had to step away within a minute or two before I did a Oscar winning faint.
In the Meantime…
While the tub is marinating we have some time to kill so we may double back to clean our cartridge and prepare for our next couple steps. As you can see in this picture, my cartridge is too far gone to clean so I will be replacing it outright. But in a standard drain and refill scenario the cartridge can be cleaned and reinstalled. Before we introduced the Jet Clean to the spa we removed the mucky cartridge per the manufacturer’s instructions. Spa guides suggest completing a quick clean of the cartridge once a month and, on the occasion of spa draining, to do a thorough deep soak cleaning overnight.
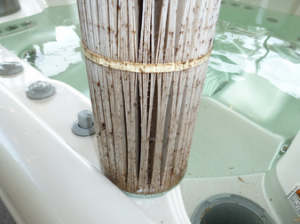 For deep cleans all we need is a five gallon bucket, water and a Filter Clean solution. First, we’ll do a preliminary wash down of the cartridge just to get the big stuff out of the way and then we introduce the filter clean to the water. Always remember water before acid. Do not switch the process unless you are a fan of flying acid. [Sidenote, Flying Acid would make one heck of a name for a band.] Let the cartridge soak in a safe place overnight and awake to a like-new cartridge.
Ding Ding Ding, the Hour is Up!
Time for round two of 15 – 20 minute circulation cycle for the Jet Clean. This cycle is meant to flush out the hard to budge gunk and grime that the one hour marinating cycle loosened. After the 15 minutes let the fumes ventilate. Take a look at the stew of 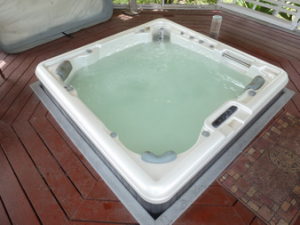 organic and inorganic treats that have been gumming up your spa. Personally I knew my spa was in bad condition but seeing all the nasty stuff from the pipes expelled made me realize how important staying on top of spa maintenance is for a healthy you and a healthy spa.
The Jet Clean worked well but it did not loosen the gobbledygook [and yes, that is an official term] in the bottoms drains. I have to leave that until I drain the spa.
This Spa Is….Clear
Ok, now that we have pristine pipes we need to give the shell some TLC. For that, we will be using Leisure Time’s Cleanse. This product is similar to that of a toilet bowl cleaner. It is a thick liquid gel that clings to the surface of the tub. It is a liquid gel cleaner which is applied to the water and non-submerged parts of the tub. Make sure to wear rubber gloves when handling these chemicals. As you can see, I was a little unprepared so I subbed in my work gloves.
Before using Cleanse, use it on a small inconspicuous spot of the shell to ensure it will not harm your tub. Cleanse is not to be used on copper, porcelain, marble or iron.
The bottle’s instructions were a little vague on whether to use this product before or after draining. To be on the safe side, I slotted this step after Jet Clean and before draining. I chose to stick this treatment in between pipe prep and tub drain so there was no contamination of the new water.
Draining the Spa, the Easy Part?
After we have given the tub a thorough pipe and tub cleaning, we must drain the spa. Essentially, we just brushed the spa’s teeth, did a swig of mouthwash and now it is time for the “spit.”
This is where it got hairy for me. Most spas are equipped with a bottom drain that make drainage simple and quick.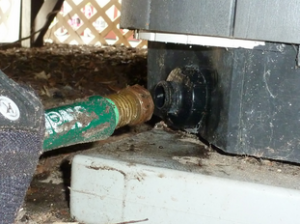
The drain is shown in this picture. The location of the drain allows gravity to aid in draining, making it simple. The drain cap is located on the bottom corner of the tub (location varies). Consult your manual on what the procedure is to loosen yours. Mine involved attaching a hose and then turning the body of the drain to the left.
This is how it works in an ideal situation, but sadly for me, this situation was not an option. After several attempts to get my spa drain to respond – which involved crawling under my gazebo deck and acquiring many a bug bite – I gave up. The drain was clogged or the release cap was defective; either way, I had to get the now milky gruel of treated water out of my tub. I had to resort to the siphon method of removing water which proved to be disgusting and time consuming. If you are unfamiliar with this highly technical method of liquid removal, let me expound; it involves taking one end of a hose sticking it in the hot tub and then sucking the water through the hose through your mouth. Not only is this method time consuming because water flow is not very fast, it is also disgusting. Be sure to thoroughly wash out your mouth after the water starts to flow.
No matter the method of draining, always make sure the water is draining to a safe area. Preferably, we would want to drain the treated water into a designated waste drain. Keep in mind that the water does have strong solvents and cleaners so unless you want a dead lawn I would avoid using it to water your grass or garden.
The Ickie Shuffle
Ok all the water is out of out of the spa but do you remember those drains and how cruddy they looked? Well they are still down there waiting for me, and giving me a dirty look. By this time I had run out and gotten some rubber gloves so as to not feel forever unclean after finishing the task.
Each drain is secured to the spa using a couple screws which are easy to remove. Lefty Loosey, Righty Tighty.
I gave these guys a little extra love and care because of the pile up of slime. I removed what I could by hand and then let them soak in a soapy solution to disinfect the grodiness that lay within. If I could have given these drains a pedicure I would have; going by their previous workload, they needed some pampering. After the 10 – 20 minute soak, I reattached the drain covers.
Tub Gloss
We have gotten through the muck and the mire portion of the job but we still have the finishing touches of cleaning before we can start to fill the tub. After months of exposure to chlorine, bromine sun and heavy bather load, the tub’s gloss has probably lost some of its luster. To pep it up a little I did a quick once over with an all purpose  cleaner, in this case Leisure Time’s Citrabright. I hit the skimmer area hard as well as the parts the Cleanse step didn’t reach. After the application and wipe down, let the tub dry before we move on.
We want to bring out the sparkle of the tub to restore it from its rough summer and protect it going forward. To get the desired effect, we will be using glossing agent to bring out the shine and also shield the shell of the tub. It is the same principle as waxing your car, not only is it pretty it also protects. After the initial application, let it set for a few minutes and then wipe down with a dry cloth.
By the way, you should be proud of me for not making a pun in this section. Hopefully the explanation was thorough and I didn’t gloss over the subject…. I’m so sorry.
The Refilling
Close the drain of the spa and begin to refill with a standard garden hose. I suggest running the water for a minute of two before placing the hose in the spa to prevent any contaminants within the hose from tainting the new spa water. Halfway through the refill, use the metal sequestering agent MetalGon to rid the water of iron, copper or calcium. Metals can cause damage to the heater elements and and other spa equipment.
I’ll See Ya When I See Ya
That is it until next time when we discuss the spa refilling procedure. If you are in dire need of answers now before the our next post, feel free to give our techs a call at 877-372-6038




One thought on “Why Is My Spa Dirty? Part 2: The Draining”